Confused by complex code? Let our AI-powered Code Explainer demystify it for you. Try it out!
Controlling a web browser from a program can be useful in many scenarios; example use cases are website text automation, and web scraping. A very popular framework for this kind of automation is Selenium WebDriver.
Selenium WebDriver is a browser-controlling library that supports all major browsers (Firefox, Edge, Chrome, Safari, Opera, etc.) and is available for different programming languages, including Python. In this tutorial, we will be using its Python bindings to automate login to websites.
Automating the login process to a website proves to be handy. For example, you may want to edit your account settings automatically, or you want to extract some information that requires login, such as extracting email addresses. You can use Python to extract links that are only available after login, download images inside your account, and many more use cases.
We also have a tutorial on extracting web forms using the BeautifulSoup library, so you may want to combine extracting login forms and filling them with the help of this tutorial.
First, let's install Selenium for Python:
$ pip3 install seleniumThe next step is installing the driver specific to the browser we want to control. Download links are available on this page. I'm installing ChromeDriver, but you're free to use your favorite.
To make things concrete, I'll use the GitHub login page to demonstrate how you can automatically log in using Selenium.
Open up a new Python script and initialize the WebDriver:
from selenium import webdriver
from selenium.webdriver.support.ui import WebDriverWait

# Github credentials
username = "username"
password = "password"

# initialize the Chrome driver
driver = webdriver.Chrome("chromedriver")
After you download and unzip the driver for your OS, put it in your current directory or in a known path, so you can pass it to webdriver.Chrome() class. In my case, chromedriver.exe is in the current directory, so I simply pass its name to the constructor.
Since we're interested in automating Github login, we'll navigate to GitHub login page and inspect the page to identify its HTML elements:
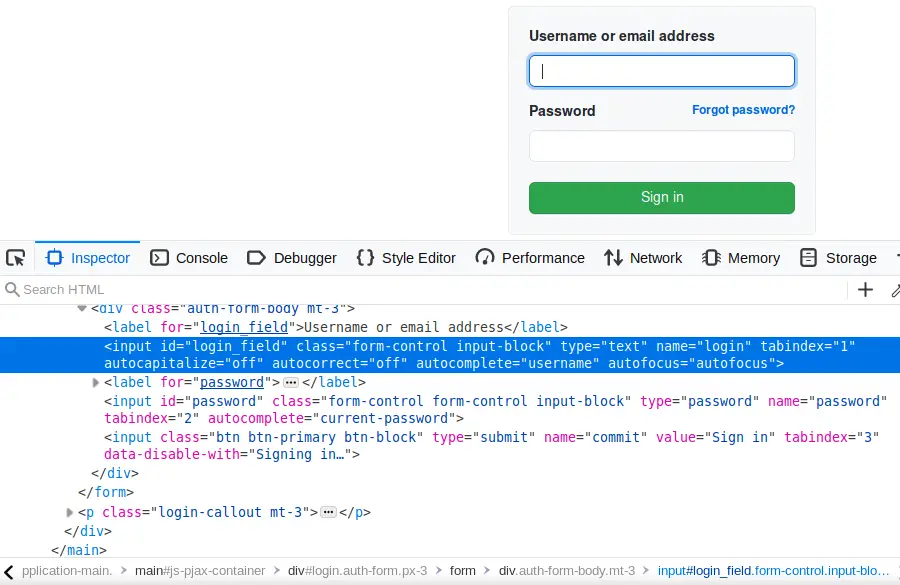 The
The id of the login and password input fields, and the name of the Sign-in button will be useful for us to retrieve these elements in code and insert them programmatically.
Notice the username/email address input field has login_field id, where the password input field has the id of password, see also the submit button has the name of commit. The below code goes to the GitHub login page, extracts these elements, fills in the credentials, and clicks the button:
# head to github login page
driver.get("https://github.com/login")
# find username/email field and send the username itself to the input field
driver.find_element("id", "login_field").send_keys(username)
# find password input field and insert password as well
driver.find_element("id", "password").send_keys(password)
# click login button
driver.find_element("name", "commit").click()
We use the find_element() function and pass the "id" to the first parameter to retrieve an HTML element by its id, and the send_keys() method simulates keypresses. The above code cell will make Chrome type in the email and the password and then click the Sign in button.
The next thing to do is to determine whether our login was successful, there are many ways to detect that, but in this tutorial, we'll do it by detecting the shown errors upon login (of course, this will change from one website to another).
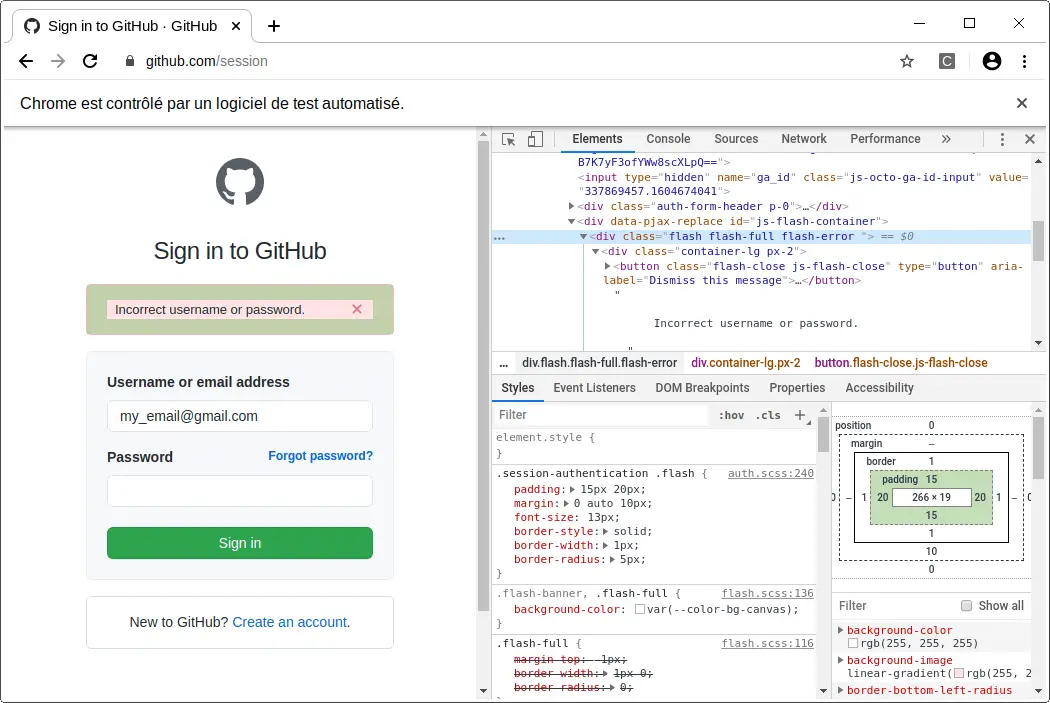 The above image shows what happens when we insert the wrong credentials. You'll see a new HTML
 div element with the class "flash-error" that has the text of "Incorrect username or password.".
The below code is responsible for waiting for the page to be loaded after the login is performed using WebDriverWait(), and checks for the error:
# wait the ready state to be complete
WebDriverWait(driver=driver, timeout=10).until(
    lambda x: x.execute_script("return document.readyState === 'complete'")
)
error_message = "Incorrect username or password."
# get the errors (if there are)
errors = driver.find_elements("css selector", ".flash-error")
# print the errors optionally
# for e in errors:
#     print(e.text)
# if we find that error message within errors, then login is failed
if any(error_message in e.text for e in errors):
    print("[!] Login failed")
else:
    print("[+] Login successful")
We use WebDriverWait to wait until the document finished loading, the execute_script() method executes Javascript in the context of the browser, the JS code return document.readyState === 'complete' returns True when the page is loaded, and False otherwise.
To confirm we're logged in, let's extract the public GitHub repositories of our logged-in user:
# an example scenario, show me my public repositories
repos = driver.find_element("css selector", ".js-repos-container")
# wait for the repos container to be loaded
WebDriverWait(driver=driver, timeout=10).until((lambda x: repos.text != "Loading..."))
# iterate over the repos and print their names
for repo in repos.find_elements("css selector", "li.public"): # you can use "li.private" for private repos
    print(repo.find_element("css selector", "a").get_attribute("href"))
Here's the output:
[+] Login successful
https://github.com/x4nth055/pythoncode-tutorials
https://github.com/x4nth055/ethical-hacking-tools-python
https://github.com/x4nth055/emotion-recognition-using-speech
Finally, we close our driver:
# close the driver
driver.close()
Conclusion
Alright, now you have the skill to log in automatically to the website of your choice. Note that GitHub will block you when you run the script multiple times with the wrong credentials, so be aware of that.
Now you can do what you want to do after you log in using your account; you can add the code you want after the login.
Also, if you've successfully logged in using your real account, you may encounter email confirmation if you have Two-factor authentication enabled. To bypass that, you can either disable it or read your email programmatically with Python and extract the confirmation code, and insert it in real-time using Selenium. It's a great challenge, isn't it? Good luck with it!
Check the full code here.
Learn also: How to Use GitHub API in Python.
Happy Automating ♥
Want to code smarter? Our Python Code Assistant is waiting to help you. Try it now!
View Full Code Transform My Code


Got a coding query or need some guidance before you comment? Check out this Python Code Assistant for expert advice and handy tips. It's like having a coding tutor right in your fingertips!