Want to code faster? Our Python Code Generator lets you create Python scripts with just a few clicks. Try it now!
It's no secret that Python is a powerful and most used programming language. Its versatile nature makes it a popular choice for developers worldwide.
This article is for you if you have fancied building your own MP3 downloader from YouTube video URLs. In this article, we will show you how to harness the power of Python to build your MP3 downloader.
If you want to download videos from YouTube in Python, there is a similar tutorial on downloading YouTube videos with the quality you want.
We will walk you through building your own MP3 downloader using Python. We will start by discussing the dependencies you will need for this project. Then, we will move on to designing the graphical user interface for the application. Finally, we will show you how to test the MP3 downloader to ensure it works correctly. So, if you're ready to start, let's dive in!
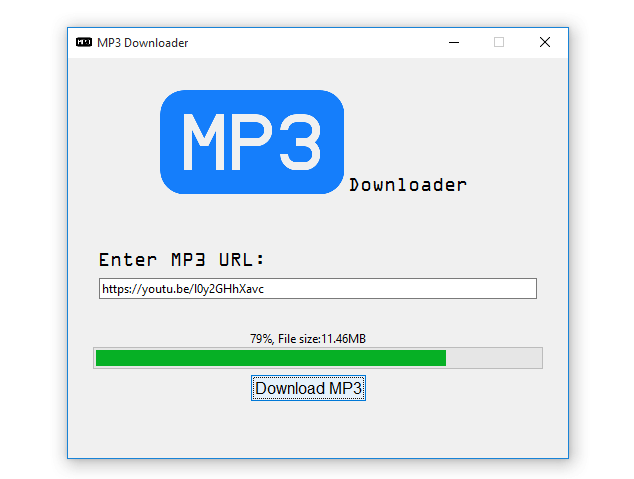
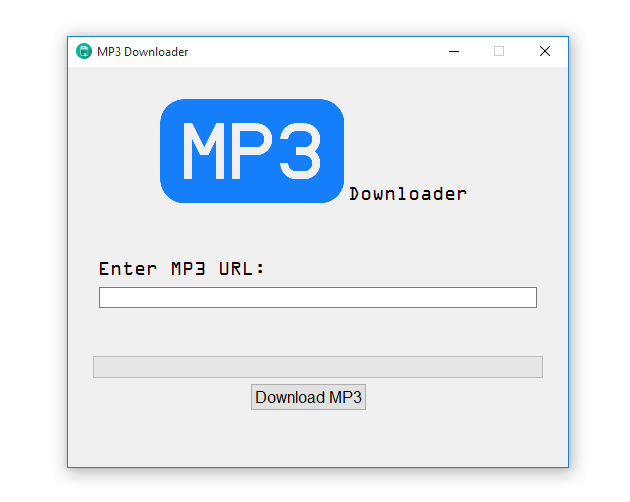
At the end of this article, we are going to build a snazzy application that looks like this:
 We will make every bit of it from the ground up.
Here is the table of contents:
- Setting up the Environment
- Designing the Graphical User Interface
- Implementing the Download MP3 File Functionality
- Conclusion
Setting up the Environment
First things first, let us install the primary library that we will use for downloading the audio files, the pytube:
$ pip install pytubeDesigning the Graphical User Interface
After installing the required library, let us start the GUI designing process. Create a new Python file and call it mp3_downloader.py; you can name it what you want. Just make sure the file name makes sense. Open it and add the following imports:
from tkinter import *
from tkinter import ttk
from pytube import YouTube
from tkinter.messagebox import showinfo, showerror, askokcancel
import threading
import os
Let us break down the imports in the code snippet. We are importing everything from tkinter; this is done using the * symbol, then we are importing ttk from tkinter, a module for styling the widgets. From pytube, we are importing the YouTube object; this will help us extract audio from a YouTube video and then download that audio file.
We are also importing messagebox from tkinter like showinfo, showerror, and askokcancel. The threading library will help the application run tasks concurrently, like running the window and extracting and downloading the audio file simultaneously. Finally, we import the os library; to convert the downloaded audio file to a .mp3 file type.
Designing the Main Window and the Canvas
Now that the necessary imports have been taken care of, let us get right into the GUI designing task; we will start by designing the main window and the canvas, so just below the imports, add the following code:
# creates the window using Tk() function
window = Tk()
# creates title for the window
window.title('MP3 Downloader')
# the icon for the application, this will replace the default tkinter icon
window.iconbitmap(window, 'icon.ico')
# dimensions and position of the window
window.geometry('500x400+430+180')
# makes the window non-resizable
window.resizable(height=FALSE, width=FALSE)
# creates the canvas for containing all the widgets
canvas = Canvas(window, width=500, height=400)
canvas.pack()
# this runs the app infinitely
window.mainloop()
Breaking down the above code snippet, we create the main window using the Tkinter's built-in class Tk(); then, we give it a title using the title() function. The iconbitmap() function is used to add an icon to the window that replaces the default Tkinter icon; ensure the icon is located in the same folder as the Python file.
To give the main window dimensions and position, we are using the geometry() function. For the height and width, we have 500x400, and for positioning the window vertically and horizontally, we have 430+180. We want the window to be non-resizable, so to do that, let us use the resizable() function with height and width both set to FALSE, this will disable the maximize/minimize button on the window.
After taking care of the main window, we create the canvas using the Canvas() function; this is a Tkinter widget that acts as a container for other widgets. We are placing it inside the main window and giving it a height of 500 and a width of 400. Finally, to have the main window running infinitely, we use the mainloop() function, so the window will be open until the user closes it.
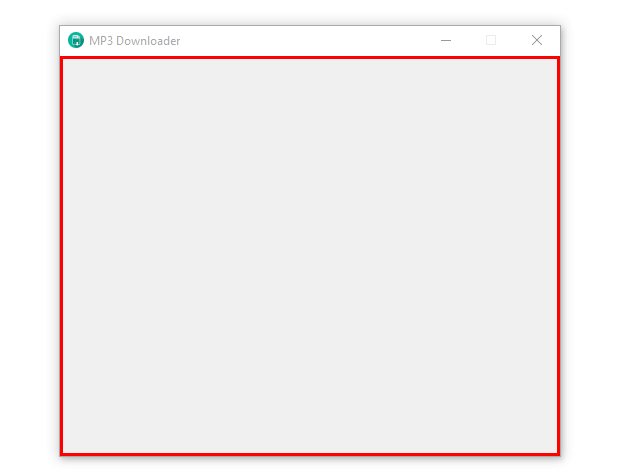
If we run the code, we will get this output:
 Though the canvas is not visible, this is how it fits inside the main window:
 Defining the Widgets Styles
Before we start creating the widgets inside the canvas, let us, first of all, define the styles. We will use the ttk module for this task. Just below the canvas, add this code:
"""Styles for the widgets"""
# style for the label
label_style = ttk.Style()
label_style.configure('TLabel', foreground='#000000', font=('OCR A Extended', 15))
# style for the entry
entry_style = ttk.Style()
entry_style.configure('TEntry', font=('Dotum', 15))
# style for the button
button_style = ttk.Style()
button_style.configure('TButton', foreground='#000000', font='DotumChe')
The code snippet uses the ttk.Style() class to create three style objects. After completing each style, we use the configure() function to name the styles; in our case, we have named the styles TLabel, TEntry, and TButton. The function also takes other arguments like foreground and font.
Adding the MP3 Logo and the Downloader Label
Now that we have created the canvas containing all the other widgets and successfully defined the widgets' styles, we can start creating the widgets. We will first add the MP3 logo and the Downloader text. To do this, add the following code just after the styles:
# loading the MP3 logo
logo = PhotoImage(file='mp3_icon.png')
# creates dimensions for the logo
logo = logo.subsample(2, 2)
# adding the logo to the canvas
canvas.create_image(180, 80, image=logo)
# the Downloader label just next to the logo
mp3_label = ttk.Label(window, text='Downloader', style='TLabel')
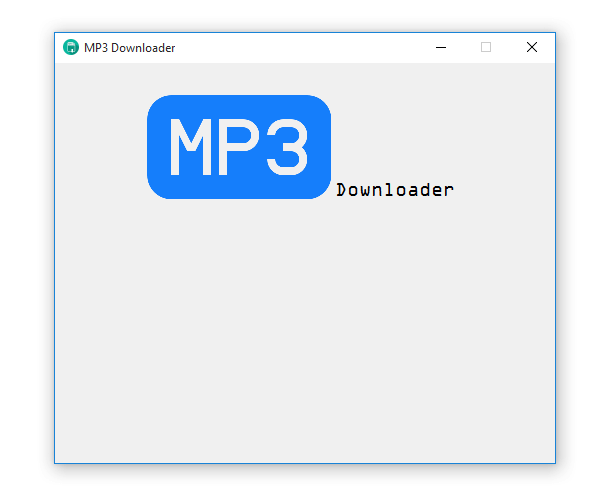
canvas.create_window(340, 125, window=mp3_label)Let us boil down the code, so we are on the same page. We are loading the icon using the Tkinter built-in PhotoImage() function, and after loading the icon, we give it dimensions utilizing the subsample() function and add it to the canvas using the create_image() function. To position the icon horizontally, we use 180 and 80 vertically.
Just next to the icon, we are adding a label with the text Downloader using the ttk.Label() function; this function takes window, text, and style as arguments. As usual, we are adding it to the canvas as well.
The code's output will be this:
 Creating the Label and the Entry
We can now make the Entry, and its Label. Below the downloader label, add this code:
# creating a ttk label
url_label = ttk.Label(window, text='Enter MP3 URL:', style='TLabel')
# creating a ttk entry
url_entry = ttk.Entry(window, width=72, style='TEntry')
# adding the label to the canvas
canvas.create_window(114, 200, window=url_label)
# adding the entry to the canvas
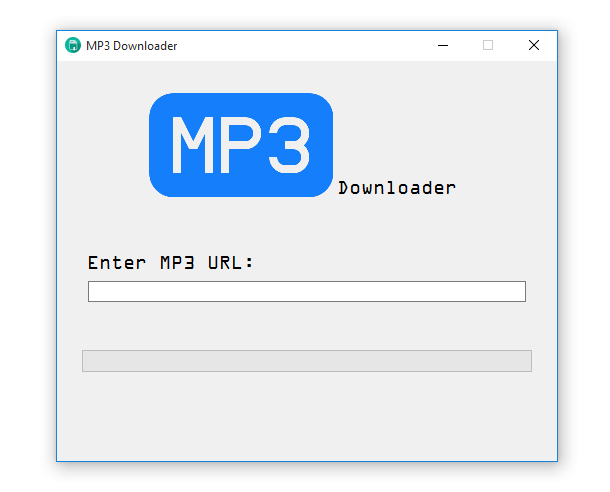
canvas.create_window(250, 230, window=url_entry)Here we are creating a label and an entry using the ttk.Label() and ttk.Entry() functions, these two widgets are added to the canvas using the canvas create_window() function.
Running the above code, we get the following output:
 So far, so good; the application is taking shape.
Creating the Progress Label and Progress Bar
Since we want the download progress to be displayed, we will add a label for displaying the download percentage and the file size, and there will be a progress bar just below it:
# creating the empty label for displaying download progress
progress_label = Label(window, text='')
# adding the label to the canvas
canvas.create_window(240, 280, window=progress_label)
# creating a progress bar to display progress
progress_bar = ttk.Progressbar(window, orient=HORIZONTAL, length=450, mode='determinate')
# adding the progress bar to the canvas
canvas.create_window(250, 300, window=progress_bar)
In the above code, we are creating a default Tkinter label using the Label() function; it takes a window and an empty string as text. Then we make a progress bar using the ttk.Progressbar() function; this function takes four arguments: window, orient, length, and mode. After creating these widgets, we add them to the canvas.
With the above code added, this is what we get now:
 Making the Download MP3 Button
Reaching this far, we only have the download button left, so below the progress bar, add the following:
# creating the button
download_button = ttk.Button(window, text='Download MP3', style='TButton')
# adding the button to the canvas
canvas.create_window(240, 330, window=download_button)
The code above is straightforward; we are creating a button using the ttk.Button() function and the arguments the function is taking are window, text, and style. Finally, we are adding it to the canvas.
The code will give us the following output:
 Let us finish off the GUI design by making it possible for the application to ask the user whether to close it; we do not want the application to close without the user's confirmation. Just below the imports, add this code:
# the function for closing the application
def close_window():
    # if askokcancel is True, close the window
    if askokcancel(title='Close', message='Do you want to close MP3 downloader?'):
        # this distroys the window
        window.destroy()
Here, the close_window() function will destroy the window via the destroy() function if the askokcancel is True, if it is False, the window will still be running. For this function to be triggered, we need to connect it to the window itself. Below this line:
window = Tk()Add this line of code:
# this will listen to the close window event
window.protocol('WM_DELETE_WINDOW', close_window)
The protocol() function takes WM_DELETE_WINDOW and the close_window() function. The logic behind all this is that the protocol() function will listen to the close window event. If the user clicks the window's close button, the close_window() function will be triggered.
Let us test and see how the application will work after the modification:
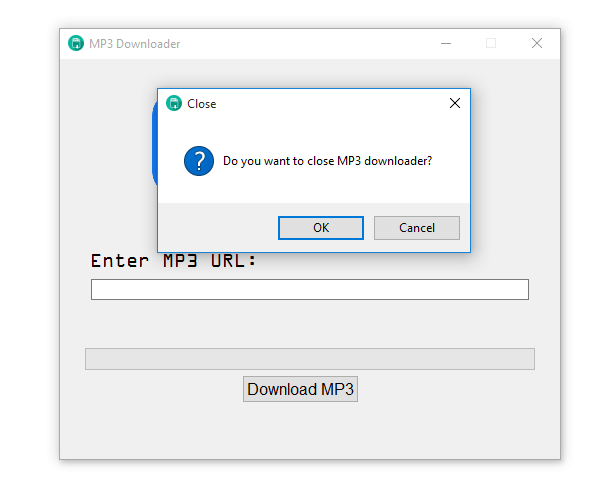 If the user clicks
 OK, the askokcancel value will be True thereby calling the destroy() function.
Implementing the Download MP3 File Functionality
Having successfully designed the graphical user interface, we will now focus on implementing the download MP3 functionality. Below the close_window() function, paste this code:
# the function to download the mp3 audio
def download_audio():
    # the try statement to excute the download the video code
    # getting video url from entry
    mp3_link = url_entry.get()
    # checking if the entry and combobox is empty
    if mp3_link == '':
        # display error message when url entry is empty
        showerror(title='Error', message='Please enter the MP3 URL')
    # else let's download the audio file
    else:
        # this try statement will run if the mp3 url is filled
        try:
            # this function will track the audio file download progress
            def on_progress(stream, chunk, bytes_remaining):
                # the total size of the audio
                total_size = stream.filesize
                # this function will get the size of the audio file
                def get_formatted_size(total_size, factor=1024, suffix='B'):
                    # looping through the units
                    for unit in ["", "K", "M", "G", "T", "P", "E", "Z"]:
                        if total_size < factor:
                            return f"{total_size:.2f}{unit}{suffix}"
                        total_size /= factor
                    # returning the formatted audio file size
                    return f"{total_size:.2f}Y{suffix}"

                # getting the formatted audio file size calling the function
                formatted_size = get_formatted_size(total_size)
                # the size downloaded after the start
                bytes_downloaded = total_size - bytes_remaining
                # the percentage downloaded after the start
                percentage_completed = round(bytes_downloaded / total_size * 100)
                # updating the progress bar value
                progress_bar['value'] = percentage_completed
                # updating the empty label with the percentage value
                progress_label.config(text=str(percentage_completed) + '%, File size:' + formatted_size)
                # updating the main window of the app
                window.update()

            # creating the YouTube object and passing the the on_progress function
            audio = YouTube(mp3_link, on_progress_callback=on_progress)
            # extracting and downloading the audio file
            output = audio.streams.get_audio_only().download()
            # this splits the audio file, the base and the extension
            base, ext = os.path.splitext(output)
		    # this converts the audio file to mp3 file
            new_file = base + '.mp3'
		    # this renames the mp3 file
            os.rename(output, new_file)
            # popup for dispalying the mp3 downlaoded success message
            showinfo(title='Download Complete', message='MP3 has been downloaded successfully.')
            # ressetting the progress bar and the progress label
            progress_label.config(text='')
            progress_bar['value'] = 0
        # the except will run when an expected error occurs during downloading
        except:
            showerror(title='Download Error', message='An error occurred while trying to ' \
                    'download the MP3\nThe following could ' \
                    'be the causes:\n->Invalid link\n->No internet connection\n'\
                     'Make sure you have stable internet connection and the MP3 link is valid')
                # ressetting the progress bar and the progress label
            progress_label.config(text='')
            progress_bar['value'] = 0
We are creating the download_audio() function in which we are getting the mp3 URL via the get() function, and we have an if statement that checks whether the entry is empty. If it is empty, we display an error messagebox. Otherwise, execute the else statement. Inside the else statement, we have the try/except block. Inside the try statement, that is where the actual downloading is happening.
We have the on_progress() function with the stream, chunk, and bytes_remaining as arguments, this function will track the downloading progress. Inside the on_progress() function, we have another function called get_formatted_size(), which is for formatting the MP3 file size into a human-readable format like KBs, MBs, GBs, TBs, etc.
After the get_formatted_size() function, the on_progress() gets the formatted size by calling the get_formatted_size() and calculates the bytes downloaded and the percentage completed. The bytes downloaded and the percentage completed are added to the empty progress label and progress bar, respectively. After all this, we are updating the window via the update() function.
Now outside the on_progress() function, we are creating the YouTube object which takes the mp3 URL and the on_progress() function. After that, we extract the audio file from an MP4 file and download it via this line of code:
output = audio.streams.get_audio_only().download()So to convert this audio file in MP4 file format to an actual MP3 file, we are using this line of code:
# this splits the audio file, the base and the extension
base, ext = os.path.splitext(output)
# this converts the audio file to mp3 file
new_file = base + '.mp3'
# this renames the mp3 file
os.rename(output, new_file)
After successfully downloading the audio file and converting it to MP3, the application displays a successful message to the user, and the progress label and progress bar are reset.
Having managed to create the download_audio() function, let us now create another function and call it downloadThread(). The primary purpose of this function is that we want it to run the download_audio() function as a thread since it handles a lot of tasks at once. So below the download_audio() function, paste these lines of code:
# the function to run the download_audio function as a thread
def downloadThread():
    t1 = threading.Thread(target=download_audio)
    t1.start()
Here we are simply creating a thread using the Thread() class; the thread's target is the download_audio() function. To start the thread, we are using the start() function.
We are almost there to download our first MP3 file; the only task that we are remaining with is binding the Download MP3 button with the downloadThread() function, to do that, edit the download_button and make it look like this:
download_button = ttk.Button(window, text='Download MP3', style='TButton', command=downloadThread)Here when the user clicks the button, the downloadThread() function will be triggered, this, in the end, will call the download_audio() function and run it as a thread.
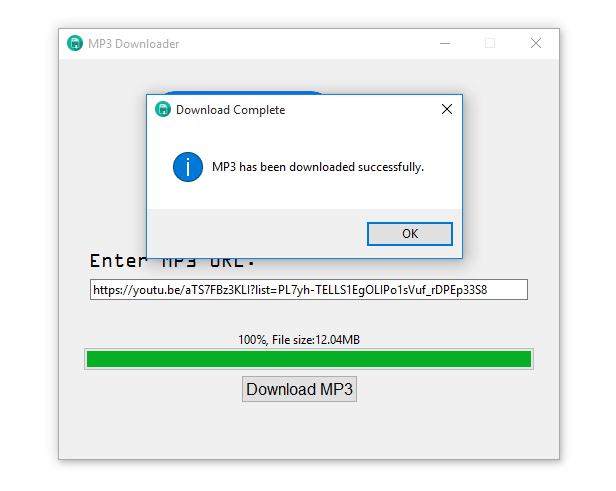
Open the application and paste the URL for the YouTube video whose audio file you want to download in the entry field and click the button; if the download was successful, you will get the output like this:
 If you check the project's folder, you will see there is an MP3 file:

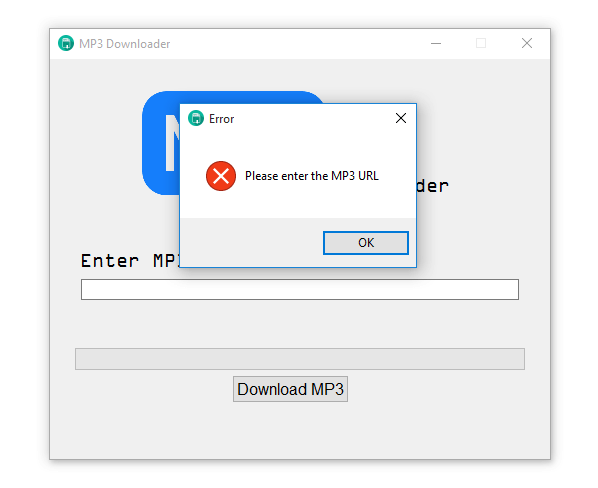
Suppose the user clicks the button without entering the URL; the application will produce this output:
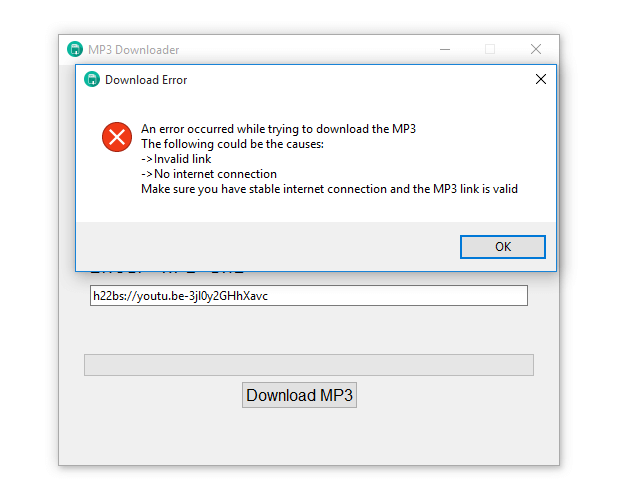
 If the user enters an invalid URL, this is the output to expect:
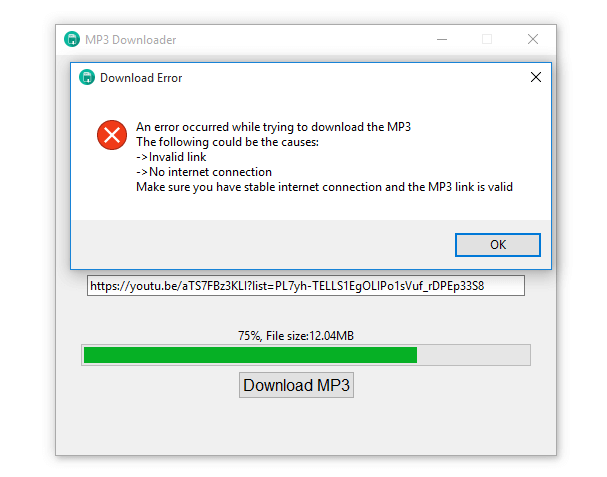
 And in case we have a broken or unstable internet connection when the actual download is in progress, this is the output we get:
 Well, the application seems to be working perfectly!
Note: Something worthy of your attention and worth mentioning here, some YouTube videos whose MP3 files you want to download will not be downloaded if the video is a live stream, is not allowed, is unavailable in your region, or is a premium video, etc.
Conclusion
Building an MP3 downloader is a great way to learn and master many Python concepts. This article has provided a step-by-step guide on how to do this. We now hope you have learned a lot from this article and will apply the knowledge gained in your future Python projects.
Get the complete code here.
Learn also: How to Make a YouTube Video Downloader in Python.
Happy coding ♥
Ready for more? Dive deeper into coding with our AI-powered Code Explainer. Don't miss it!
View Full Code Generate Python Code


Got a coding query or need some guidance before you comment? Check out this Python Code Assistant for expert advice and handy tips. It's like having a coding tutor right in your fingertips!