Ready to take Python coding to a new level? Explore our Python Code Generator. The perfect tool to get your code up and running in no time. Start now!
In this tutorial, you will learn how you can add an audio clip to a video using the MoviePy library in Python.
MoviePy library is a great tool for video editing which can be used for operations like cutting or concatenating audios and videos, video compositing, video processing, and more.
To get started, we need to install the library first:
$ pip install moviepyWe are going to build a Python script that offers as much flexibility as we can. Therefore, we'll be using the argparse module to parse the parameters from the command line:
from moviepy.editor import VideoFileClip, AudioFileClip, CompositeAudioClip
import argparse

# make a command-line argument parser & add various parameters
parser = argparse.ArgumentParser(description="Python script to add audio to video clip")
parser.add_argument("-v", "--video-file", help="Target video file")
parser.add_argument("-a", "--audio-file", help="Target audio file to embed with the video")
parser.add_argument("-s", "--start", help="Start duration of the audio file, default is 0", default=0, type=int)
parser.add_argument("-e", "--end", help="The end duration of the audio file, default is the length of the video file", type=int)
parser.add_argument("-c", "--composite", help="Whether to add to the existing audio in the video", action="store_true", default=False)
parser.add_argument("-f", "--volume-factor", type=float, default=1.0, help="The volume factor to multiply by the volume of the audio file, 1 means no change, below 1 will decrease volume, above will increase.")
# parse the arguments
args = parser.parse_args()
video_file = args.video_file
audio_file = args.audio_file
start = args.start
end = args.end
composite = args.composite
volume_factor = args.volume_factor
# print the passed parameters, just for logging
print(vars(args))
We first imported MoviePy and argparse, then we make our ArgumentParser. We've added the following parameters:
-vor--video-file: This is the target video file.-aor--audio-file: This is the audio file you want to add to the video.-sor--start: The start duration of the audio file. For example, if you want to skip the first 10 seconds of the audio, setting start to 10 will do the task. If you don't set it, it will default to 0.-eor--end: The end duration of the audio file. For example, if you want to add 5 seconds of the audio, then setting start to 0 and end to 5 will do it.-cor--composite: This is a boolean parameter, if it's set to True, then the audio file will be added to the existing audio in the video, resulting in a video with both audios (the original and the added), you can use the-for--volume-factorto reduce the volume of the added audio file.-for--volume-factor: The volume factor to multiply by the volume of the audio file. If it's set to 1, then it has no effect. Below 1 will reduce the volume, and above will increase it. This is useful if you want to add background music, you set it to say 0.1 or 0.2.
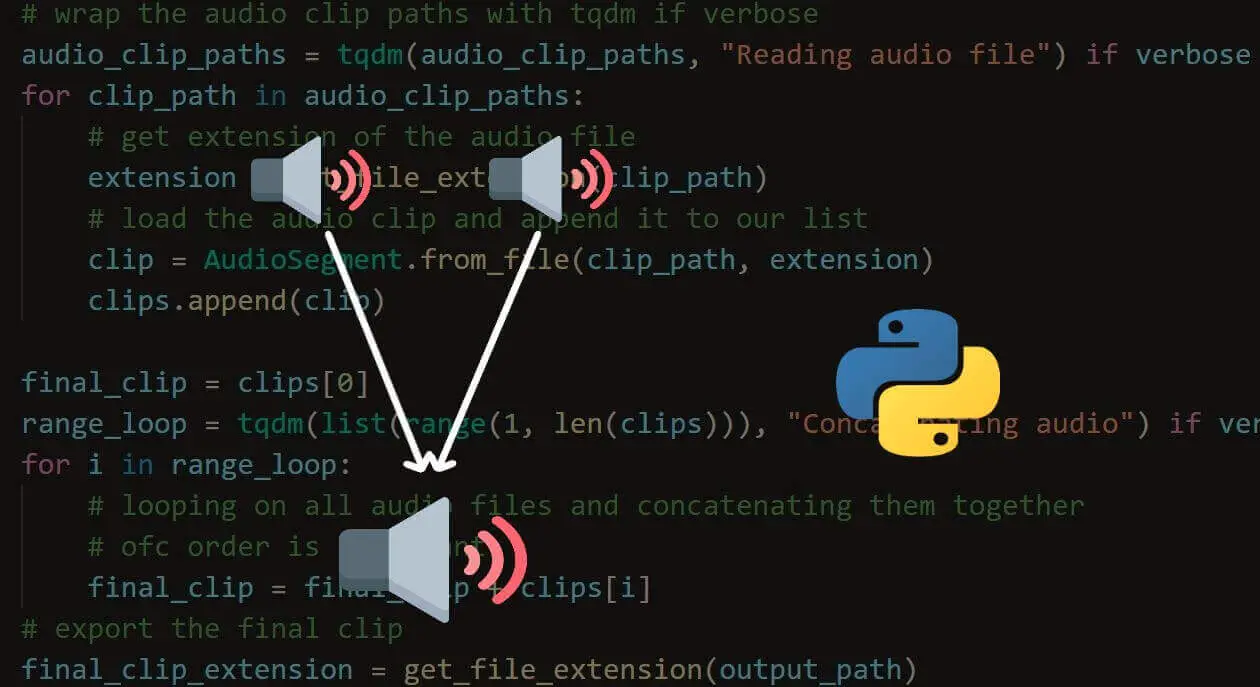
Next, let's load the video and audio files:
# load the video
video_clip = VideoFileClip(video_file)
# load the audio
audio_clip = AudioFileClip(audio_file)
Now let's apply the volume_factor to the audio_clip:
# use the volume factor to increase/decrease volume
audio_clip = audio_clip.volumex(volume_factor)
volumex() method does the job of decreasing or increasing the audio volume.
Cutting the audio file based on start and end parameters:
# if end is not set, use video clip's end
if not end:
    end = video_clip.end
# make sure audio clip is less than video clip in duration
# setting the start & end of the audio clip to `start` and `end` paramters
audio_clip = audio_clip.subclip(start, end)
If the end parameter is not set, the original video's end will be used, and the default start is 0. Next, let's add the audio to the video:
# composite with the existing audio in the video if composite parameter is set
if composite:
    final_audio = CompositeAudioClip([video_clip.audio, audio_clip])
else:
    final_audio = audio_clip
# add the final audio to the video
final_clip = video_clip.set_audio(final_audio)
If the composite parameter is set, then we use CompositeAudioClip to append the audio to the existing audio of the video clip. We then use set_audio() method to set the final_audio.
Finally, saving the resulting video clip:
# save the final clip
final_clip.write_videofile("final.mp4")
Great. Let's run the script:
$ python add_audio_to_video_moviepy.py --help
usage: add_audio_to_video_moviepy.py [-h] [-v VIDEO_FILE] [-a AUDIO_FILE] [-s START] [-e END] [-c] [-f VOLUME_FACTOR]

Python script to add audio to video clip

optional arguments:
  -h, --help            show this help message and exit
  -v VIDEO_FILE, --video-file VIDEO_FILE
                        Target video file
  -a AUDIO_FILE, --audio-file AUDIO_FILE
                        Target audio file to embed with the video
  -s START, --start START
                        Start duration of the audio file, default is 0
  -e END, --end END     The end duration of the audio file, default is the length of the video file
  -c, --composite       Whether to add to the existing audio in the video
  -f VOLUME_FACTOR, --volume-factor VOLUME_FACTOR
                        The volume factor to multiply by the volume of the audio file, 1 means no change, below 1 will decrease volume, above will
                        increase.
This is the usage. For instance, let's add the first 5 seconds of audio to a video file while decreasing the volume 5 times the original:
$ python add_audio_to_video_moviepy.py -v zoo.mp4 -a Directed-by-Robert.mp3 -c -e 5 -f 0.2You can check this link to get the example video and audio files.
A new final.mp4 will be spawned, and the following output will show:
{'video_file': 'zoo.mp4', 'audio_file': 'Directed-by-Robert.mp3', 'start': 0, 'end': 5, 'composite': True, 'volume_factor': 0.2}
Moviepy - Building video final.mp4.
MoviePy - Writing audio in finalTEMP_MPY_wvf_snd.mp3
MoviePy - Done.
Moviepy - Writing video final.mp4

Moviepy - Done !
Moviepy - video ready final.mp4
Now let's make another video file where we remove the original audio (if exists) and replace with the added audio:
$ python add_audio_to_video_moviepy.py -v zoo.mp4 -a Directed-by-Robert.mp3 Output:
{'video_file': 'zoo.mp4', 'audio_file': 'Directed-by-Robert.mp3', 'start': 0, 'end': None, 'composite': False, 'volume_factor': 1.0}
Moviepy - Building video final.mp4.
MoviePy - Writing audio in finalTEMP_MPY_wvf_snd.mp3
MoviePy - Done.
Moviepy - Writing video final.mp4

Moviepy - Done !
Moviepy - video ready final.mp4
The resulting final.mp4 video will contain the original video file along with the audio. If the duration of the audio file is longer than the video, it simply cuts it until the end of the video.
Conclusion
Alright, that's a tool for you that you can further extend if you want to. If you want to make the output video file name passed by the command arguments, you simply add an argument with add_argument() on the parser and add -o or --output-file, and then pass output_file to the write_videofile() method.
Check the full code here.
Related tutorials:
- How to Concatenate Audio Files in Python
- How to Concatenate Video Files in Python
- How to Record a Specific Window in Python
- How to Extract Frames from Video in Python
Happy coding ♥
Found the article interesting? You'll love our Python Code Generator! Give AI a chance to do the heavy lifting for you. Check it out!
View Full Code Switch My Framework


Got a coding query or need some guidance before you comment? Check out this Python Code Assistant for expert advice and handy tips. It's like having a coding tutor right in your fingertips!