Before we get started, have you tried our new Python Code Assistant? It's like having an expert coder at your fingertips. Check it out!
Writing has always been a difficult task and one thing is for sure when you are writing misspelling some words is inevitable and noticing these errors is also difficult at the same time. These days writing has been simplified in such a way that we have a plethora of tools to ease our writing tasks for us. We have tools for rephrasing sentences, generating both introductions and conclusions, summarizing paragraphs, checking and correcting grammar, etc. These tools are great but one common drawback they have is their prices, they are expensive, so if you cannot afford one then building your tool would be great and worth it.
In this tutorial, we will be building a GUI real-time spelling checker using the NLTK, re, and Tkinter libraries. This is an application that will check your sentences for grammatical errors in real time as you type in the scrollable text field. This tutorial is for you if you want to learn how to create a GUI real-time spelling checker in Python. This is what we will be building:
This tutorial will teach so many programming concepts, like creating a GUI with Tkinter, implementing events, and working with the nltk API. We will build every piece of the application from the ground up so that you can learn all the concepts covered. So if you are excited, let's get started!
Here is the table of contents:
- Prerequisites
- Getting Started
- Importing all the Required Modules
- Creating the Application Class
- Designing the Graphical User Interface
- Implementing the Real-Time Spelling Checker Functionality
- Conclusion
Prerequisites
For you to easily follow along and make the most out of this tutorial, you should have at least some object-oriented programming knowledge since we will build the application using this approach.
Getting Started
The first task to get us rolling will be installing the required module for this project, the other modules are pre-installed in Python so no need to get worried. Open your terminal and run this command:
$ pip install nltkImporting all the Required Modules
Now that we have successfully installed the required module, we will import it together with the other modules. Create a new file and call it spellingchecker.py or any name you prefer so long its meaningful, in it, paste the following code:
# this imports everything from the tkinter module
from tkinter import *
# importing the ttk module from tkinter that's for styling widgets
from tkinter import ttk
# importing a Text field with the scrollbar
from tkinter.scrolledtext import ScrolledText
# imports the re module
import re
# this imports nltk
import nltk
# importing all the words from nltk
from nltk.corpus import words
In the code above, we are importing everything from tkinter using the asterisk(*), we are then importing the ttk styling module.
To use the ScrolledText we are importing it from tkinter.scrolledtext. We also imported the re module for manipulating words and for spell checking we have imported the nltk module, we also do have a tutorial on nltk here. Finally, we are importing all the words from ntlk.corpus, these words will be used for comparison against the misspelled words in the application
Creating the Application Class
As mentioned earlier we will build the application using the object-oriented programming approach, by that we mean to structure the program by bundling related properties and behaviors into individual objects. So let us create the class for the application, below the imports add this code:
# we are creating a SpellingChecker class
class SpellingChecker:
    # a special method, always called when an instance is created
    def __init__(self, master):
        # do nothing for the meantime
        pass
To be on the same page, let us break down the above code, we create a class called SpellingChecker that is doing nothing for now and inside it, we have a special function __init__() taking self and master as arguments.
Note that every function inside a class will take self as its first argument and the __init__() function gets called when an instance or object is created. And below the class paste this code:
# creating the root winding using Tk() class
root = Tk()
# instantiating/creating object app for class SpellingChecker
app = SpellingChecker(root)
# calling the mainloop to run the app infinitely until user closes it
root.mainloop()
Here we are just creating the main window using the Tkinter Tk() built-in class, then we are creating the class object called app, note we are passing the root to the class, this is the same as the master inside the class. Finally, we are calling the mainloop() function, this runs the application infinitely until the user closes it.
Now to run the application use:
$ python spellingchecker.pyOr some coding editors come with Python interpreters for running Python programs, just use that instead.
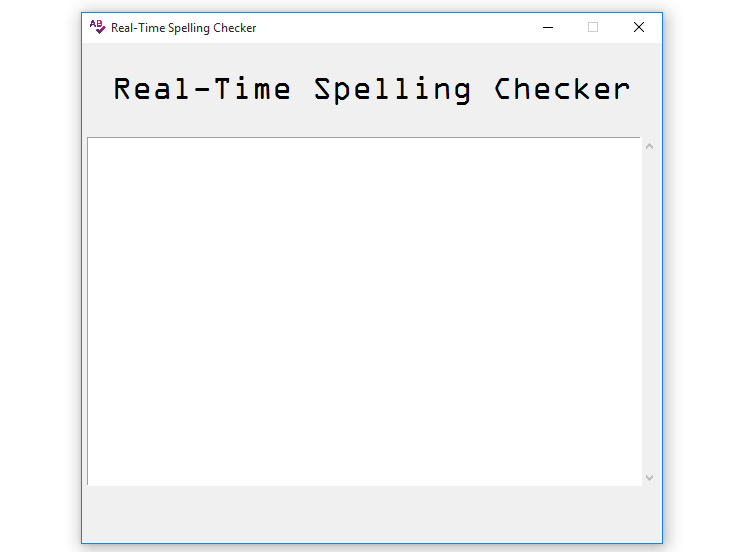
And this is what you will get:
Here we get a small and not-so-appealing window because we have not created anything in the class. We will work on the window just in a moment but the most important thing is that the program is working fine.
Something worth mentioning here: everything about the application will be created inside the class.
Designing the Graphical User Interface
In this section, we will see the power of Tkinter when it comes to designing snazzy graphical user interfaces. The designing process will be in-depth so that you understand the most important concepts in Tkinter.
Creating the Main Window and Adding Its Icon
We will now work on the small and not-so-appealing window that we saw a moment ago, we will enlarge it, give it a title and add an icon to it. So inside the __init__() function remove the pass keyword and add this code:
        # creating the main window
        self.master = master
        # giving title to the main window
        self.master.title('Real-Time Spelling Checker')
        # defining dimensions and position for the main window
        self.master.geometry('580x500+440+180')
        # adding an icon to the main window
        self.master.iconbitmap(self.master, 'spell-check.ico')
        # making the main window non-resizable
        self.master.resizable(height=FALSE, width=FALSE)
In the code snippet, we are declaring the master, which will be replaced by the root. Then we have the title() function which takes a string as an argument, this is for the title of the main window. The geometry() function is for the dimensions and position of the main window, 580x500 is for the width and height and 440+180 is for the horizontal and vertical positioning of the main window.
To add an icon to the main window we have the iconbitmap() function taking the master and the icon as arguments. Finally, we have a resizable() function with height and width both set to FALSE, what this will do is it will disable the main window’s maximize/minimize button.
Running the program, you will get this output:
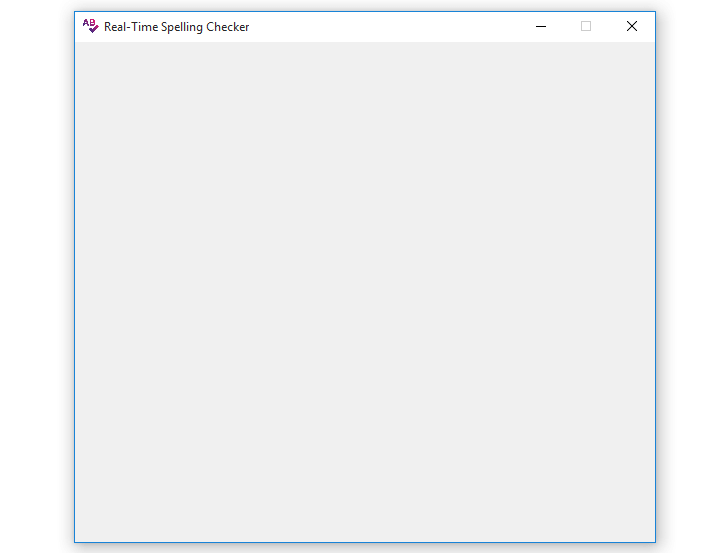
And on the top left corner of the window, we have an icon and title added:

Here just make sure the icon file is in the same folder as the program file:

Adding the Text Label
Now we will add the label for displaying the big text but before we create it let us first define its style class. Just above this line of code:
self.master = masterPaste these lines of code:
        # defining a style for the label
        style = ttk.Style()
        # configuring the style, TLabel is the style name
        style.configure('TLabel', foreground='#000000', font=('OCR A Extended', 25))
Then below the main window code, paste this code:
        # creating the label to display the big text
        self.label = ttk.Label(self.master, text='Real-Time Spelling Checker', style='TLabel')
        # adding the label to the main window using grid geometry manager
        self.label.grid(row=0, column=0, columnspan=10, padx=5, pady=25)
We are creating a ttk label using ttk.Label() function, it's taking self.master, text, and style as arguments. To place the label in the main window, we are using the grid() function whose arguments are row, column, columnspan, padx, and pady. In our case, the label occupies the 0th row, 0th column, and it is spanning up to 10 columns, and it is being padded 5 pixels vertically and 25 pixels horizontally.
The output of the added above code is this:
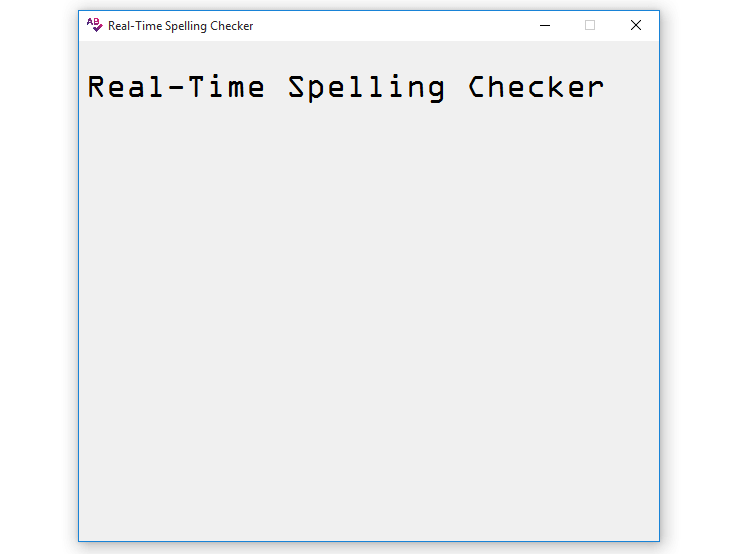
For now, do not worry about the application’s appearance, it will take its full shape as we add some widgets.
Adding the ScrolledText
Let us add the ScrolledText field, this is simply a Text field with a scrollbar on it. Below the label’s code, paste this code:
        # creating a scollable Text field
        self.text = ScrolledText(self.master, font=("Helvetica", 15), width=50, height=15)
        # bing the scrollable Text field to an event
        self.text.bind('<KeyRelease>', self.check)
        # adding the scrollable Text field to the main window using grid geometry manager
        self.text.grid(row=1, column=0, padx=5, pady=5, columnspan=10)
With the above code snippet, we are creating a ScrolledText via the ScrolledText() function which takes self.master, font, width, and height as arguments. Then we are binding it to a KeyRelease event, this will make more sense in a moment. Finally, we are adding the widget to the main window via the grid() function, we are placing it in the 1st row, 0th column, padding it 5 and 10 pixels vertically and horizontally respectively, and it is spanning up to 10 columns.
If you run the program, you will get this output:
If you try to add some long paragraphs to the ScrolledText the scrollbar will appear like this:
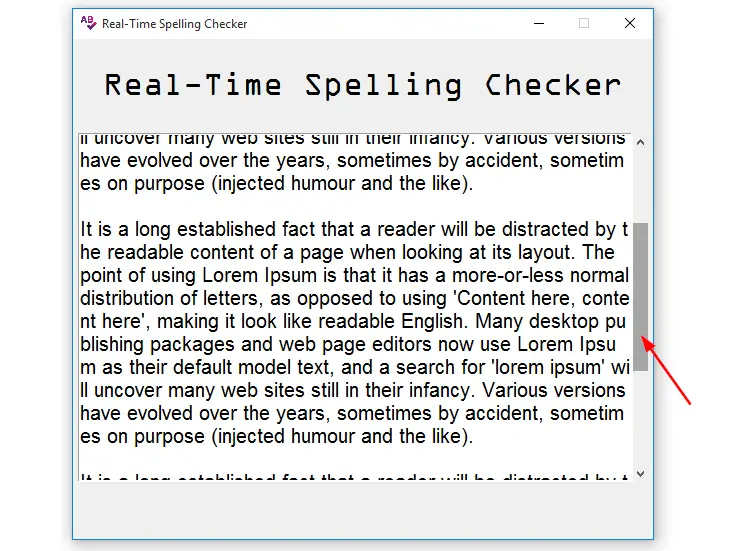
The good thing about this widget is that it comes already integrated with the scrollbar while with the Text widget, you need to add a scrollbar to it explicitly which is tedious because it requires a lot of coding.
Implementing the Close Application Functionality
Finishing off the GUI, let us make it possible for the application to ask the user whether to close it or not by the click of a button. Below the last line of imports add this code:
# importing an askyesno message box from tkinter.message
from tkinter.messagebox import askyesno
Here we are just importing the askyesno message box from tkinter.messagebox.
Now let us create the function for handling the close application functionality, inside the class below the __init__() function paste this code:
    # the function for closing the application
    def close(self):
        # this will ask the user whether to close or not
        # if the value is yes/True the window will close
        if askyesno(title='Close Real-Time Spelling Checker', message='Are you sure you want to close the application?'):
            # this destroys the window
            self.master.destroy()
This is what is happening in the code, we have a function called close() taking self as an argument. We have the askyesno message box, which evaluates into two boolean values True or False.
If the user provides a yes which evaluates to True, the destroy() function will be executed, and the main window will be closed. If the askyesno value is False the window will still be running.
Creating the function is not enough, we need to bind it to the main window to listen to the close window event. So below this line:
self.master.resizable(height=FALSE, width=FALSE)Add this line of code:
# this is for closing the window via the close() function
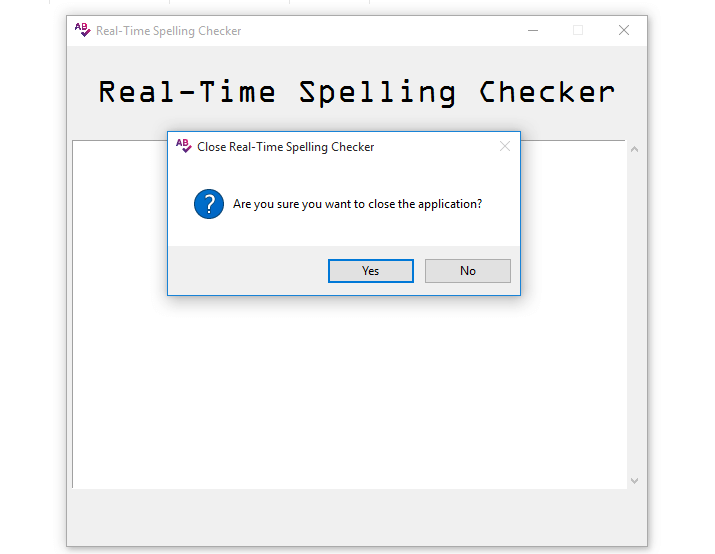
self.master.protocol('WM_DELETE_WINDOW', self.close)With this line of code, the protocol() function takes WM_DELETE_WINDOW and the close function as arguments, to point to the function we are using the self keyword. With the help of WM_DELETE_WINDOW, the function will listen for the close main window event, which is emitted whenever the user clicks the close button on the main window.
If the event is detected, the close() function is executed, and the askyesno message box appears, if the user clicks yes the window closes, and if no the window still runs.
Let us test this functionality, run the program and you will get this output:
Congratulations on successfully creating the app GUI!
Implementing the Real-Time Spelling Checker Functionality
Designing a GUI for an app is not enough, but the real joy comes when you make it perform its intended function. In this section, we will be implementing the real-time spelling-checking functionality. So inside the class create a function called check() as in the code snippet below:
    # this is the function for checking spelling in real-time
    def check(self, event):
        print('Hello am a real time checker')
The function above is taking self and event as arguments. We have a print() function for printing text on the terminal. Edit this line of code:
self.text.bind('<KeyRelease>')And make it look like this:
self.text.bind('<KeyRelease>', self.check)Here is what is happening, we are passing an event and the self.check to the bind function. The function passed will be triggered after the event has occurred. In our case, the event is KeyRelease, which means the check() function will be executed after every key release in the ScrolledText.
Let us test this, run the program, and start typing in the ScrolledText, the output in your console will be as follows:

We want the application to be able to check spellings in real-time and when the Space bar key is pressed. Now that you have seen how events come in handy when doing real-time tasks, let's implement the actual functionality of the app.
So above the class paste this line of code:
# this will download the words
nltk.download('words')
This line of code is for downloading all the words, and we will use these words for checking against the misspelled words in the application.
Run the program and you will get this output in your console:
![]()
Note this, every time you run the program it will always download the words dataset from the nltk library.
We will create a variable for tracking white spaces in the words, so below the style’s code, paste this code:
        # variable for tracking white space, default is 0
        self.old_spaces = 0
Its default value is 0. Below the close() function paste the following code:
# this is the function for checking spelling in real-time
def check(self, event):
    # getting all the content from the ScrolledText via get() function
    # 1.0 is the starting point and END is the end point of the ScrolledText content
    content = self.text.get('1.0', END)
    # getting all the white spaces from the content
    space_count = content.count(' ')
    # checking if the space_count is not equal to self.old_spaces
    if space_count != self.old_spaces:
        # updating the self.old_spaces to space_count
        self.old_spaces = space_count
        # this loops through all the tag names
        # and deletes them if the word is valid
        for tag in self.text.tag_names():
            self.text.tag_delete(tag)
        # splitting the content by white space
        # and looping through the split content to get a single word
        for word in content.split(' '):
            # with the sub() function we are removing special characters from the word
            # replacing the special character with nothing
            # the target is word.lower()
            # checking if the cleaned lower case word is not in words
            if re.sub(r'[^\w]', '', word.lower()) not in words.words():
                # gets the position of the invalid word
                position = content.find(word)
                # adding a tag to the invalid word
                self.text.tag_add(word, f'1.{position}', f'1.{position + len(word)}')
                # changing the color of the invalid word to red
                self.text.tag_config(word, foreground='red')
Let us breakdown the code inside the check() function whose arguments are self and event:
- First, we are getting every character from the
ScrolledText via theget()function, 1.0 is the starting point of the characters whileENDis the end point of the characters. - To get all the white spaces from the content we are using the
content.count(' ') - We have an
ifstatement that checks if thespace_countis not equal toself.old_spaces, if that isTrue, we updateself.old_spacestospace_count. - The first
forloop inside theifstatement loops through all the tag names and removes them from the attached word if it is having the correct spelling. - With the second
forloop, we are splitting the contents of theScrolledTextviacontent.split(' '), then we loop through the split contents and access a single word. - Then we have another
ifstatement for checking the validity of the word, we have there.sub()function that gets all the special characters and replaces them with an empty string on the lower-cased word. - If the word is not valid, we are getting its position via
content.find()function and we are adding to it from its first to last character - Finally, we are adding color to the word using the
tag_config()function which takes thewordandforegroundas arguments.
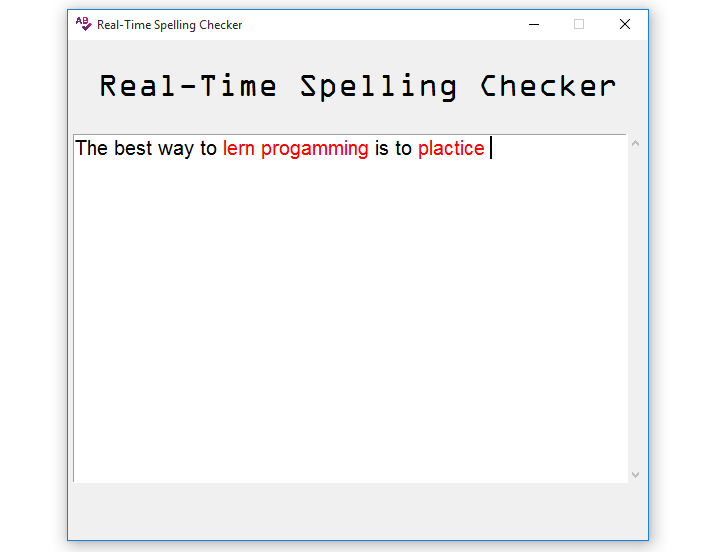
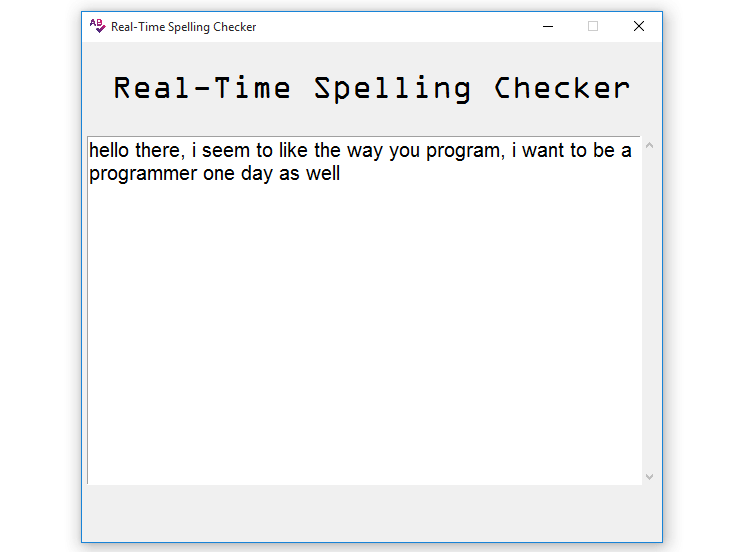
Now we are set to test the application, let us run the program and type a sentence with some misspelled words, this is the output that we will get:

This time let us try a sentence without any misspelled words, the output you will get is as below:
Great! The app is working as expected!
As you have noticed the application starts by downloading all the words and to validate the spelling of a word, press the Space bar key.
Conclusion
That’s it from this tutorial we hope you have enjoyed it. This tutorial has walked you through the process of coding a GUI real-time spelling checker using Python from scratch to a fully functional application.
We hope you have learned a lot from this tutorial and that the knowledge you have acquired will be useful in your future Python projects. Thanks for following along.
You can get the complete code here.
Learn also: How to Make a Rich Text Editor with Tkinter in Python.
Happy coding ♥
Ready for more? Dive deeper into coding with our AI-powered Code Explainer. Don't miss it!
View Full Code Explain My Code


Got a coding query or need some guidance before you comment? Check out this Python Code Assistant for expert advice and handy tips. It's like having a coding tutor right in your fingertips!